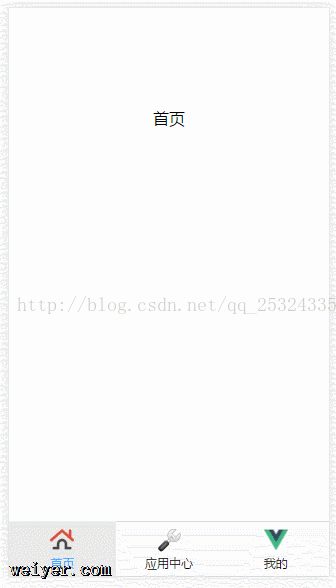
本节包含以下内容:
使用vue-cli脚手架搭建一个项目,项目的主界面搭建vue-router的使用。
1.项目搭建
使用vue-cli的脚手架可以帮助我们快速的搭建一个基于webpack的vue项目,在命令行输入vue init webpack '项目名称',可以快速的创建一个完整的工程。这里一路的敲回车保持默认就可以了。
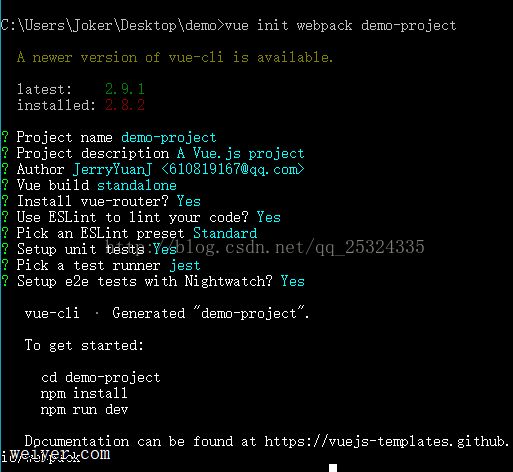
其次我们进入项目根目录,在命令行输入 npm install 进行依赖的安装,如果速度慢的话可以使用cnpm安装。安装过程中遇到莫名其妙的错误可以将node_modules目录删除后重新npm install。
接着我们安装我们本项目需要用到的一些依赖,这里我一次性都安装了,也可以用到哪个安装哪个。要install的有:vuex,axios,mint-ui,echarts,css-loader,style-loader。(以上如果在使用vue-cli创建项目时根据提示安装过的话,不需要再次安装了)。这些依赖安装时是要添加到dependencies里面去的。
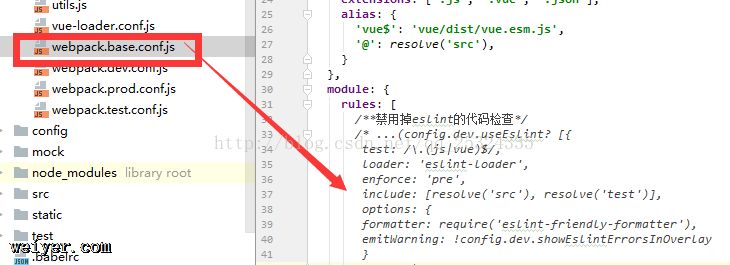
接着我们要配置一下我们的webpack.base.conf.js文件,将里面的eslint代码检查给注释掉,以为我们开发阶段要按照这种规则来编码的话,是很费事的一件事。
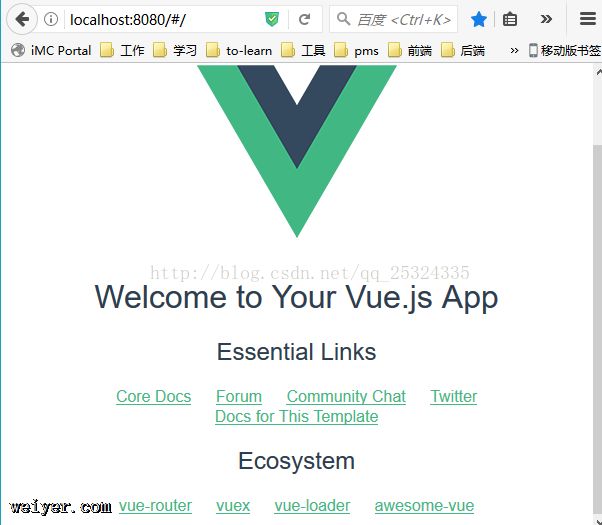
接下来在项目根目录下运行 npm run dev就可以运行项目了,运行成功的界面显示如下:
2.项目主界面搭建
首先,项目的结构目录如下,每个人风格不一样,根据项目组规定来就好了。
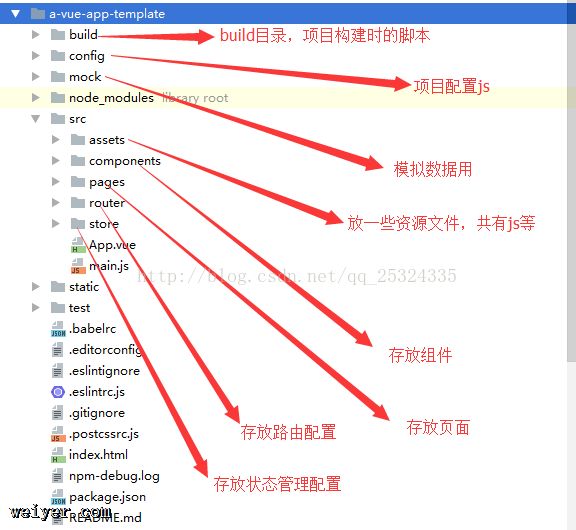
由上一节的演示图可以看到,主界面的布局由两部分组成,底部Tab和剩余的显示部分。所以这里我们就需要在App.vue中设置我们的页面,这要用到路由。
不过首先,我们先将底部的Tab抽取出来成为一个组件使用。代码如下:
<template>
  <p id="tab-bar">
    <mt-tabbar v-model="selected" v-show="isShow" fixed class="border-1px-top">
      <mt-tab-item id="main">
        <img :src="img1" slot="icon">首页
      </mt-tab-item>
      <mt-tab-item id="tool">
        <img :src="img3" slot="icon">应用中心
      </mt-tab-item>
      <mt-tab-item id="my">
        <img :src="img5" slot="icon">我的
      </mt-tab-item>
    </mt-tabbar>
  </p>
</template>
<style>
</style>
<script>
  export default {
    data(){
      return {
        selected: 'main',
        img1: "static/home_selected.png",
        img3: "static/tool.png",
        img5: "src/assets/logo.png"
      }
    },
    computed: {
      isShow: function () {
        return true;
      }
    },
    watch: {
      'selected': {
        handler(){
          if (this.selected == "main") {
            this.$router.push('/main');
            this.img1 = "static/home_selected.png"
          } else {
            this.img1 = "static/home.png"
          }
          if (this.selected == "tool") {
            this.$router.push('/tool');
            this.img3 = 'static/tool_selected.png'
          } else {
            this.img3 = 'static/tool.png'
          }
          if (this.selected == "my") {
            this.$router.push('/my')
            this.img5 = "static/user_selected.png";
          } else {
            this.img5 = "static/user.png";
          }
        }
      }
    }
  }
</script>
1.v-show的属性,是用来控制其是否显示的,因为我们的一些界面(比如备忘列表界面)是不需要显示底部tab的,所以这里就要将底部的tab隐藏
掉。这里先写死,后面会有用vuex来进行管理。
2.将selected作为观察者,是因为要处理其显示的改变和进行页面跳转,当某一个tab选中时,进行selected的icon显示。这些逻辑都是在watch里面处理的。
3.fixed是将tabbar固定在底部栏。
底部栏有了以后,我们就要将其作为主界面的一部分应用上去了。具体是修改项目的App.vue文件,代码如下:
<template>
  <p id="app">
    <p class="content-p">
      <!--<transition enter-active-class="animated zoomIn" leave-active-class="animated zoomOut">-->
        <router-view/>
      <!--</transition>-->
    </p>
    <footer-bar class="footer"></footer-bar>
  </p>
</template>

<script>
  import Footer from './components/FooterBar.vue'
  export default {
    name: 'app',
    components: {
      'footer-bar': Footer
    },
    computed: {}
  }
</script>

<style scoped="">
  .content-p {
    margin-bottom: 55px;
  }
</style>
以main.vue为例,其他类似:
<template>
  <p id="index">
    首页
  </p>
</template>
<style scoped>
  #index{
    display: flex;
    justify-content: center;
    margin-top: 100px;
  }
</style>
<script>
  export default{}
</script>
然后将这三个界面配置到router文件夹下的index.js中去:
import Vue from 'vue'
import Router from 'vue-router'
import Main from '../pages/main.vue'
import Tool from '../pages/tool.vue'
import My from '../pages/my.vue'

Vue.use(Router);

export default new Router({
  routes: [
    {
      path: "/", component: Main
    },
    {
      path: '/main', component: Main
    }, {
      path: '/tool', component: Tool
    }, {
      path: '/my', component: My
    }
  ]
})
接着我们修改项目的main.js文件,将路由和其他组件也都引入进来使用。
import Vue from 'vue'
import App from './App'
import router from './router'
import MintUI from 'mint-ui'
//import store from './store/index.js'状态管理的,目前还没用上
import echarts from 'echarts'

Vue.prototype.$echarts = echarts

Vue.use(MintUI);

/*Vue.config.productionTip = false;*/


new Vue({
  el: '#app',
  router,
  //store,
  template: '<App/>',
  components: {App}
});
<!DOCTYPE html>
<html>
  <head>
    <meta charset="utf-8">
    <meta name="viewport" content="width=device-width,initial-scale=1.0">
    <link rel="stylesheet" href="node_modules/mint-ui/lib/style.css">
    <title>a-vue-app-template</title>
    <style>
      body {
        margin: 0;
        padding: 0;
        border: 0;
      }
    </style>
  </head>
  <body>
    <p id="app"></p>
    <!-- built files will be auto injected -->
  </body>
</html>
这时候我们项目的基本结构已经出来了,这时候在项目根路径下npm run dev可以看到如下效果:
