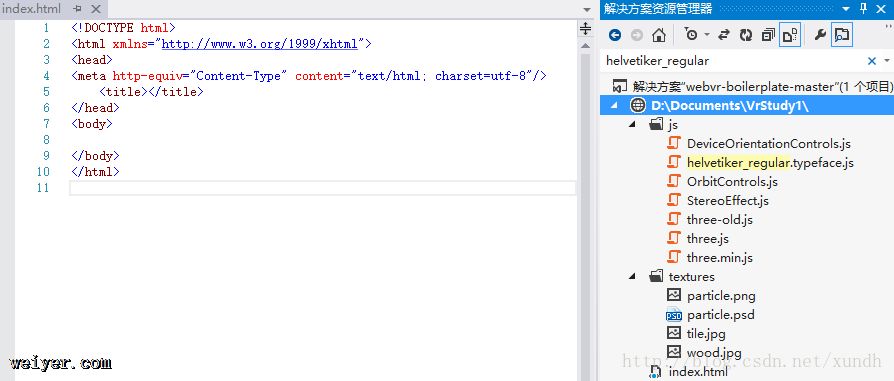
使用自己熟悉的开发环境创建一个web项目,把上面下载项目里的/js 、 /textures放到项目里,新建一个index.html文件。

下载的项目里有完整的源码,本文基本是对其程序说明做简单翻译。
引用的文件说明
three.min.js : Threejs库 StereoEffect.js:允许我们把普通的Three.js分成两个显示的场景合并到一起显示,这是VR体验的基本需求 DeviceOrientationControls.js:告诉Three.js设备的朝向、向哪移动。 OrbitControls.js:允许我们通过拖动、点击事件来控制场景(在DeviceOrientation事件无效的时候,比如电脑模拟时适用) helvetiker_regular.typeface.js:将在Three.js显示文本用到的字体下面是init()函数,其中有一些内容在前几章已有提及,这里不会完全详述。
        function init() {
            scene = new THREE.Scene();
            camera = new THREE.PerspectiveCamera(90, window.innerWidth / window.innerHeight, 0.001, 700);
            camera.position.set(0, 15, 0);
            scene.add(camera);
            /*
            我们需要一个元素来画场景,这里定义一个renderer,并且给HTML元素webglviewer声明一个变量
            */
            renderer = new THREE.WebGLRenderer();
            element = renderer.domElement;
            container = document.getElementById('webglviewer');
            container.appendChild(element);
            //为了有VR双屏的视图,需要StereoEffect
            effect = new THREE.StereoEffect(renderer);

            //控制摄像机
            controls = new THREE.OrbitControls(camera, element);
            controls.target.set(
              camera.position.x + 0.15,
              camera.position.y,
              camera.position.z
            );
            controls.noPan = true;
            controls.noZoom = true;
            //加入设备事件,该事件返回的结果有三个属性值
            window.addEventListener('deviceorientation', setOrientationControls, true);
            //如果没有设备支持DeviceOrientation特性,还要给controls变量加上OrbitControls对象,并
            //且使用我们自己的DeviceOrientationControls对象替换它
            //接下来运行connect和update函数
            controls = new THREE.DeviceOrientationControls(camera, true);
            controls.connect();
            controls.update();
            //鼠标点击、全屏,这样在google cardboard里看起来效果更好
            element.addEventListener('click', fullscreen, false);
            //删除deviceorientation事件,因为已经定义了我们自己的DeviceOrientationControls对象
            window.removeEventListener('deviceorientation', setOrientationControls, true);


        }
        function setOrientationControls(e) {
            //通过alpha属性来确保监测的是我们需要的事件
            if (!e.alpha) {
                return;
            }
        }
创建灯光
var light = new THREE.PointLight(0x999999, 2, 100);
light.position.set(50, 50, 50);
scene.add(light);

var lightScene = new THREE.PointLight(0x999999, 2, 100);
lightScene.position.set(0, 5, 0);
scene.add(lightScene);
创建地板(加载材质)
var floorTexture = THREE.ImageUtils.loadTexture('textures/wood.jpg');
floorTexture.wrapS = THREE.RepeatWrapping;
floorTexture.wrapT = THREE.RepeatWrapping;
floorTexture.repeat = new THREE.Vector2(50, 50);

floorTexture.anisotropy = renderer.getMaxAnisotropy();
//我们的地板需要texture和material,其中material控制我们的地板如何跟随灯光变化
//我们使用了MeshPhoneMaterial可以让对象跟随灯光效果看起来更舒适
var floorMaterial = new THREE.MeshPhongMaterial({
  color: 0xffffff,
  specular: 0xffffff,
  shininess: 20,
  shading: THREE.FlatShading,
  map: floorTexture
});
定义几何体
var geometry = new THREE.PlaneBufferGeometry(1000, 1000);
在场景里加入地板
var floor = new THREE.Mesh(geometry, floorMaterial);
floor.rotation.x = -Math.PI / 2;
scene.add(floor);
把粒子放到一起
先定义一些粒子相关的公用变量,并且创建了一个粒子对象,用来保存浮动的粒子,后面会详细讲解这些变量。
particles = new THREE.Object3D(),
totalParticles = 200,
maxParticleSize = 200,
particleRotationSpeed = 0,
particleRotationDeg = 0,
lastColorRange = [0, 0.3],
currentColorRange = [0, 0.3],
现在在一个比较高的水平上来整体看一下代码。我们把一个透明的png图”textures/particle.png”初始化为texture。上面定义了总粒子数量为totalParticles,如果想增加场景里的粒子数量,可以把这个值增大。
下面遍历粒子并把它们加入到了粒子对象里,我们需要把粒子对象升高以让它旋浮起来。
var particleTexture = THREE.ImageUtils.loadTexture('textures/particle.png'),
    spriteMaterial = new THREE.SpriteMaterial({
    map: particleTexture,
    color: 0xffffff
  });

for (var i = 0; i < totalParticles; i++) {
  // Code setting up all our particles!
}

particles.position.y = 70;
scene.add(particles);
接下来创建一个Three.js Sprite对象,并把spriteMaterial赋给它,然后把它缩放到64×64(与texture一样大)。我们希望粒子是围绕我们出现在随机的位置,所以把它设置有x和y值介于-0.5到0.5之间,z值在-0.75到0.25之间。关于为什么选取这些值,在一些实践之后,这些应该是最佳的实践值。
for (var i = 0; i < totalParticles; i++) {
  var sprite = new THREE.Sprite(spriteMaterial);

  sprite.scale.set(64, 64, 1.0);
  sprite.position.set(Math.random() - 0.5, Math.random() - 0.5, Math.random() - 0.75);
把每个粒子的尺寸都限制0到maxParticleSize之间
sprite.position.setLength(maxParticleSize * Math.random());
让粒子看起来平滑的一个关键点是THREE.AdditiveBlending ,它是Three.js里的弯曲风格。这个会给texture赋给它后面一种texture的颜色,以让整个粒子系统看起来更平滑。
sprite.material.blending = THREE.AdditiveBlending;

  particles.add(sprite);
}
天气API
目前已经有了一个拥有地板、灯光的静态场景。现在添加一个OpenWeatherMap API获取各城市的天气以让demo显得更有趣。
OpenWeatherMap使用一个HTTP请求来获取多个城市天气。下面定义了cityIDs变量保存需要的各个城市,从网址:
https://78.46.48.103/sample/city.list.json.gz.
可以获取到城市列表。
function adjustToWeatherConditions() {
  var cityIDs = '';
  for (var i = 0; i < cities.length; i++) {
    cityIDs += cities[i][1];
    if (i != cities.length - 1) cityIDs += ',';
  }
我们的城市数组包括了名称和IDs,这样可以显示天气数据的时候也显示城市的名字。
为了调用API,还需要一个API key,可以到网站https://openweathermap.org创建一个账号
使用getURL()函数可以获取XMLHttpRequest请求。如果收到一个关于”crossorigin”错误,那需要改用JSONP。
这是调用示例:
getURL('https://api.openweathermap.org/data/2.5/group?id=' + cityIDs + '&APPID=kj34723jkh23kj89dfkh2b28ey982hwm223iuyhe2c', function(info) {
  cityWeather = info.list;
当然天气服务并非本文重点,下面跳过一部分内容。
保存时间
clock = new THREE.Clock();
动起来
在init()函数里已经调用了animate。
我们还需要决定粒子要转动的方向,如果风力小于或等于180,那就顺时针转,否则就逆时针转。
function animate() {
  var elapsedSeconds = clock.getElapsedTime(),
      particleRotationDirection = particleRotationDeg <= 180 ? -1 : 1;
为了在Three.js动画的每一帧真实的旋转它们,我们需要计算动画已经运行了多少秒,乘上速度,这样计算出粒子y值。
particles.rotation.y = elapsedSeconds * particleRotationSpeed * particleRotationDirection;
同样我们还需要跟踪当前的和上次的颜色信息,这样我们知道在哪些帧里改变它们。这里新的光线值介于0.2到0.7之间。
if (lastColorRange[0] != currentColorRange[0] && lastColorRange[1] != currentColorRange[1]) {
  for (var i = 0; i < totalParticles; i++) {
    particles.children[i].material.color.setHSL(currentColorRange[0], currentColorRange[1], (Math.random() * (0.7 - 0.2) + 0.2));
  }

  lastColorRange = currentColorRange;
}
接下来循环动画:
requestAnimationFrame(animate);
最后让一切平滑连运动起来:
update(clock.getDelta())
render(clock.getDelta())
effect.render(scene, camera);
源码
其中去掉了天气部分
<!DOCTYPE html>
<html lang="en">
  <head>
    <title>Connecting up Google Cardboard to web APIs</title>
    <meta http-equiv="Content-Type" content="text/html; charset=utf-8" />
    <meta name="viewport" content="width=device-width, user-scalable=no, minimum-scale=1.0, maximum-scale=1.0">
    <style>
      body {
        margin: 0px;
        overflow: hidden;
      }
      #webglviewer {
        bottom: 0;
        left: 0;
        position: absolute;
        right: 0;
        top: 0;
      }
    </style>
  </head>
  <body>
    <p id="webglviewer"></p>

    <script src="./js/three.min.js"></script>
    <script src="./js/StereoEffect.js"></script>
    <script src="./js/DeviceOrientationControls.js"></script>
    <script src="./js/OrbitControls.js"></script>
    <script src="./js/helvetiker_regular.typeface.js"></script>

    <script>
        var scene,
            camera,
            renderer,
            element,
            container,
            effect,
            controls,
            clock,

            // Particles
            particles = new THREE.Object3D(),
            totalParticles = 200,
            maxParticleSize = 200,
            particleRotationSpeed = 0,
            particleRotationDeg = 0,
            lastColorRange = [0, 0.3],
            currentColorRange = [0, 0.3],

            // City and weather API set up
            cities = [['Sydney', '2147714'], ['New York', '5128638'], ['Tokyo', '1850147'], ['London', '2643743'], ['Mexico City', '3530597'], ['Miami', '4164138'], ['San Francisco', '5391959'], ['Rome', '3169070']],
            cityWeather = {},
            cityTimes = [],
            currentCity = 0,
            currentCityText = new THREE.TextGeometry(),
            currentCityTextMesh = new THREE.Mesh();

        init();

        function init() {
            scene = new THREE.Scene();
            camera = new THREE.PerspectiveCamera(90, window.innerWidth / window.innerHeight, 0.001, 700);
            camera.position.set(0, 15, 0);
            scene.add(camera);

            renderer = new THREE.WebGLRenderer();
            element = renderer.domElement;
            container = document.getElementById('webglviewer');
            container.appendChild(element);

            effect = new THREE.StereoEffect(renderer);

            // Our initial control fallback with mouse/touch events in case DeviceOrientation is not enabled
            controls = new THREE.OrbitControls(camera, element);
            controls.target.set(
              camera.position.x + 0.15,
              camera.position.y,
              camera.position.z
            );
            controls.noPan = true;
            controls.noZoom = true;

            // Our preferred controls via DeviceOrientation
            function setOrientationControls(e) {
                if (!e.alpha) {
                    return;
                }

                controls = new THREE.DeviceOrientationControls(camera, true);
                controls.connect();
                controls.update();

                element.addEventListener('click', fullscreen, false);

                window.removeEventListener('deviceorientation', setOrientationControls, true);
            }
            window.addEventListener('deviceorientation', setOrientationControls, true);

            // Lighting
            var light = new THREE.PointLight(0x999999, 2, 100);
            light.position.set(50, 50, 50);
            scene.add(light);

            var lightScene = new THREE.PointLight(0x999999, 2, 100);
            lightScene.position.set(0, 5, 0);
            scene.add(lightScene);

            var floorTexture = THREE.ImageUtils.loadTexture('textures/wood.jpg');
            floorTexture.wrapS = THREE.RepeatWrapping;
            floorTexture.wrapT = THREE.RepeatWrapping;
            floorTexture.repeat = new THREE.Vector2(50, 50);
            floorTexture.anisotropy = renderer.getMaxAnisotropy();

            var floorMaterial = new THREE.MeshPhongMaterial({
                color: 0xffffff,
                specular: 0xffffff,
                shininess: 20,
                shading: THREE.FlatShading,
                map: floorTexture
            });

            var geometry = new THREE.PlaneBufferGeometry(1000, 1000);

            var floor = new THREE.Mesh(geometry, floorMaterial);
            floor.rotation.x = -Math.PI / 2;
            scene.add(floor);

            var particleTexture = THREE.ImageUtils.loadTexture('textures/particle.png'),
                spriteMaterial = new THREE.SpriteMaterial({
                    map: particleTexture,
                    color: 0xffffff
                });

            for (var i = 0; i < totalParticles; i++) {
                var sprite = new THREE.Sprite(spriteMaterial);

                sprite.scale.set(64, 64, 1.0);
                sprite.position.set(Math.random() - 0.5, Math.random() - 0.5, Math.random() - 0.75);
                sprite.position.setLength(maxParticleSize * Math.random());

                sprite.material.blending = THREE.AdditiveBlending;

                particles.add(sprite);
            }
            particles.position.y = 70;
            scene.add(particles);


            clock = new THREE.Clock();

            animate();
        }


        function animate() {
            var elapsedSeconds = clock.getElapsedTime(),
                particleRotationDirection = particleRotationDeg <= 180 ? -1 : 1;

            particles.rotation.y = elapsedSeconds * particleRotationSpeed * particleRotationDirection;

            // We check if the color range has changed, if so, we'll change the colours
            if (lastColorRange[0] != currentColorRange[0] && lastColorRange[1] != currentColorRange[1]) {

                for (var i = 0; i < totalParticles; i++) {
                    particles.children[i].material.color.setHSL(currentColorRange[0], currentColorRange[1], (Math.random() * (0.7 - 0.2) + 0.2));
                }

                lastColorRange = currentColorRange;
            }

            requestAnimationFrame(animate);

            update(clock.getDelta());
            render(clock.getDelta());
        }

        function resize() {
            var width = container.offsetWidth;
            var height = container.offsetHeight;

            camera.aspect = width / height;
            camera.updateProjectionMatrix();

            renderer.setSize(width, height);
            effect.setSize(width, height);
        }

        function update(dt) {
            resize();

            camera.updateProjectionMatrix();

            controls.update(dt);
        }

        function render(dt) {
            effect.render(scene, camera);
        }

        function fullscreen() {
            if (container.requestFullscreen) {
                container.requestFullscreen();
            } else if (container.msRequestFullscreen) {
                container.msRequestFullscreen();
            } else if (container.mozRequestFullScreen) {
                container.mozRequestFullScreen();
            } else if (container.webkitRequestFullscreen) {
                container.webkitRequestFullscreen();
            }
        }

    </script>
  </body>
</html>
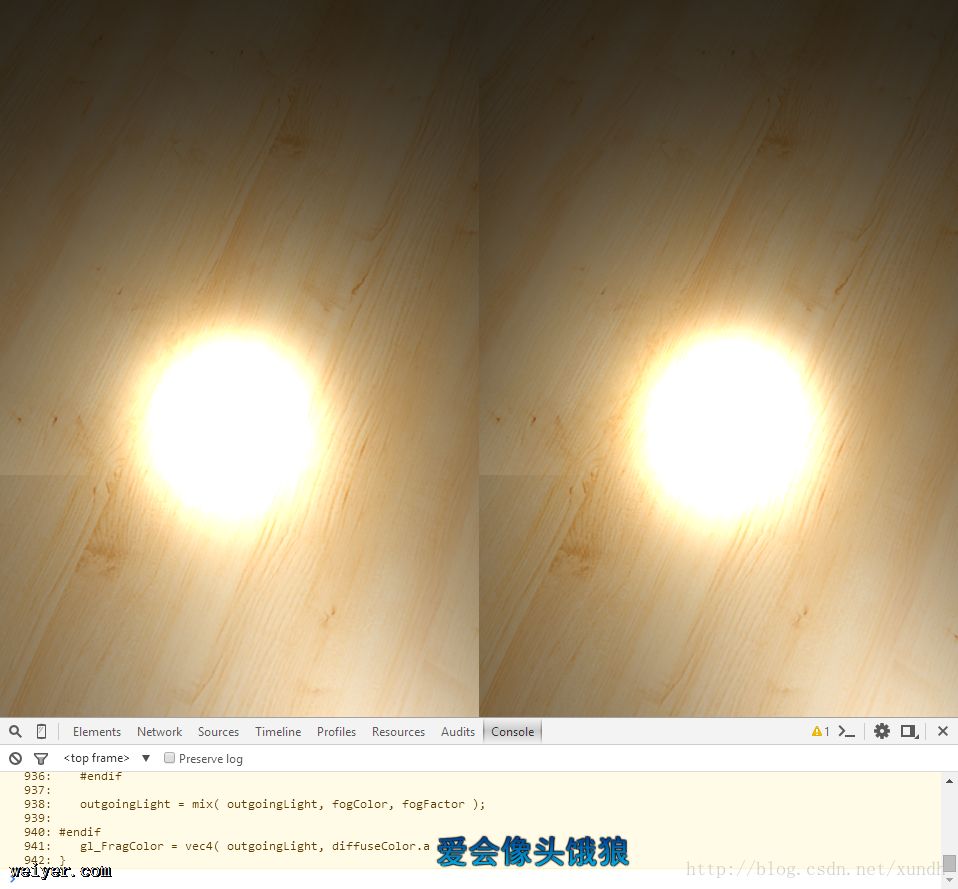
效果:

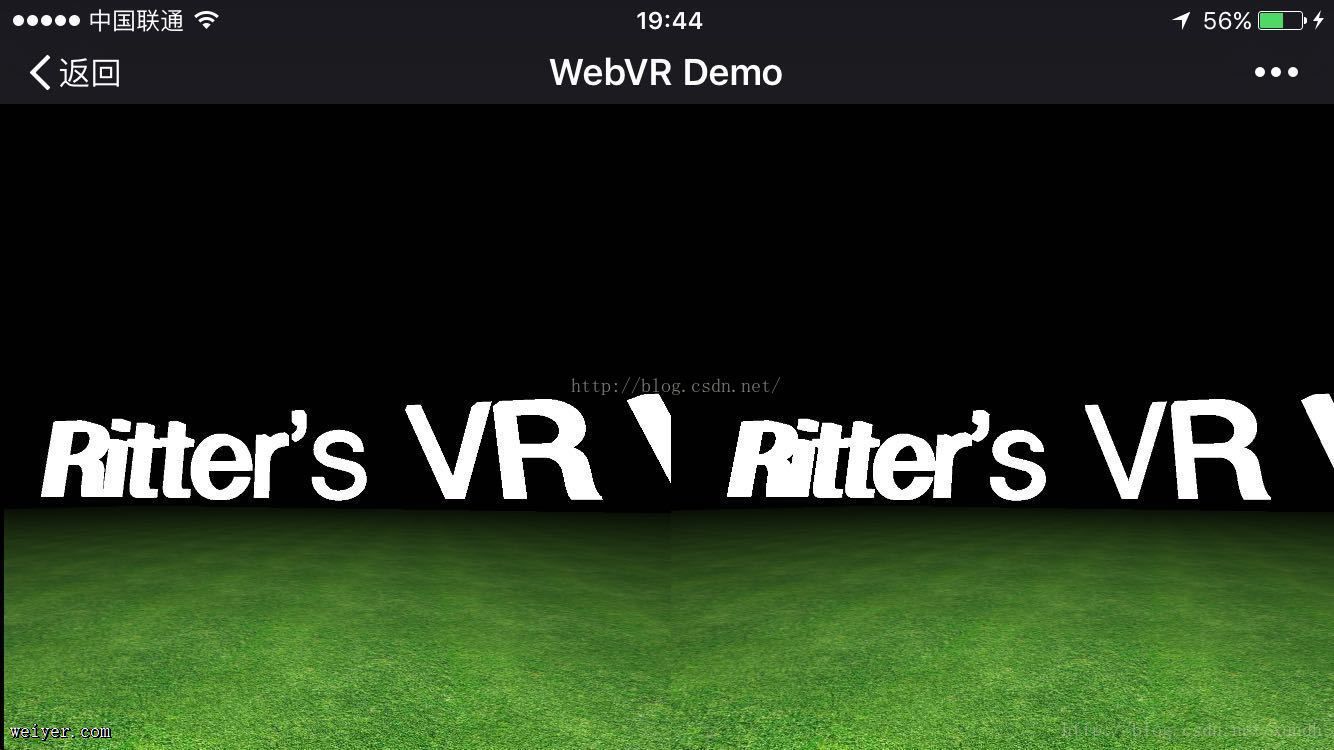
效果:

源码:
<!DOCTYPE html>
<html>
<head>
  <title>WebVR Demo</title>
  <style>
  body {
    width: 100%;
    height: 100%;
    background-color: #000;
  }
  </style>
</head>
<body>
  <script src="./js/three.min.js"></script>
  <script src="./js/StereoEffect.js"></script>
  <script src="./js/OrbitControls.js"></script>
  <script src="./js/DeviceOrientationControls.js"></script>
  <script src="./js/helvetiker_regular.typeface.js"></script>

  <script>
  var scene, camera, renderer, effect, element, controls, word = "HELLO VR World", cube;
  init();

  function init() {
    scene = new THREE.Scene();
    camera = new THREE.PerspectiveCamera(90, window.innerWidth / window.innerHeight, 0.001, 700);
    camera.position.set(0, 15, 0);
    scene.add(camera);

    renderer = new THREE.WebGLRenderer();
    element = renderer.domElement;
    document.body.appendChild(renderer.domElement);

    effect = new THREE.StereoEffect(renderer);

    //Handle mouse control
    controls = new THREE.OrbitControls(camera, renderer.domElement);
    controls.target.set(
      camera.position.x + 0.01,
      camera.position.y,
      camera.position.z
    );
    window.addEventListener('deviceorientation', setDeviceOrientationControls, true);

    //Create light
    var light = new THREE.PointLight( 0xffffff, 1.2, 0 );
    light.position.set(0, 50, 0);
    scene.add(light);

    // Create floor
    var floorTexture = THREE.ImageUtils.loadTexture('img/grass.jpg');
    floorTexture.wrapS = THREE.RepeatWrapping;
    floorTexture.wrapT = THREE.RepeatWrapping;
    floorTexture.repeat = new THREE.Vector2(50, 50);
    var floorMaterial = new THREE.MeshPhongMaterial({
      map: floorTexture
    });
    var floorGeometry = new THREE.PlaneBufferGeometry(1000, 1000);
    var floor = new THREE.Mesh(floorGeometry, floorMaterial);
    floor.rotation.x = -Math.PI / 2;
    scene.add(floor);

    // Create box
    var geometry = new THREE.BoxGeometry(6, 6, 6);
    var material = new THREE.MeshNormalMaterial();
    cube = new THREE.Mesh(geometry, material);
    cube.position.set(-15, 30, 10);
    scene.add(cube);

    //Create text
    var textGeometry = new THREE.TextGeometry(word, {
      size: 5,
      height: 1
    });
    var text = new THREE.Mesh(textGeometry, new THREE.MeshBasicMaterial({
      color: 0xffffff
    }));
    text.position.set(15, 15, -25);
    text.rotation.set(0, 30, 0);
    scene.add(text);

    animate();
  }

  // Our preferred controls via DeviceOrientation
  function setDeviceOrientationControls(e) {
    controls = new THREE.DeviceOrientationControls(camera, true);
    controls.connect();
    controls.update();
    window.removeEventListener('deviceorientation', setDeviceOrientationControls, true);
  }

  function animate() {
    requestAnimationFrame(animate);

    var width = window.innerWidth;
    var height = window.innerHeight;

    camera.aspect = width / height;
    camera.updateProjectionMatrix();

    renderer.setSize(width, height);
    effect.setSize(width, height);

    cube.rotation.x += 0.01;
    cube.rotation.y += 0.01;

    controls.update();
    effect.render(scene, camera);
  }
  </script>
</body>
</html>


