CSS3位变形支持提供了如下两个属性值:
transform:向元素应用 2D 或 3D 转换。该属性允许我们对元素进行旋转、缩放、移动或倾斜。CSS3提供了如下变形函数
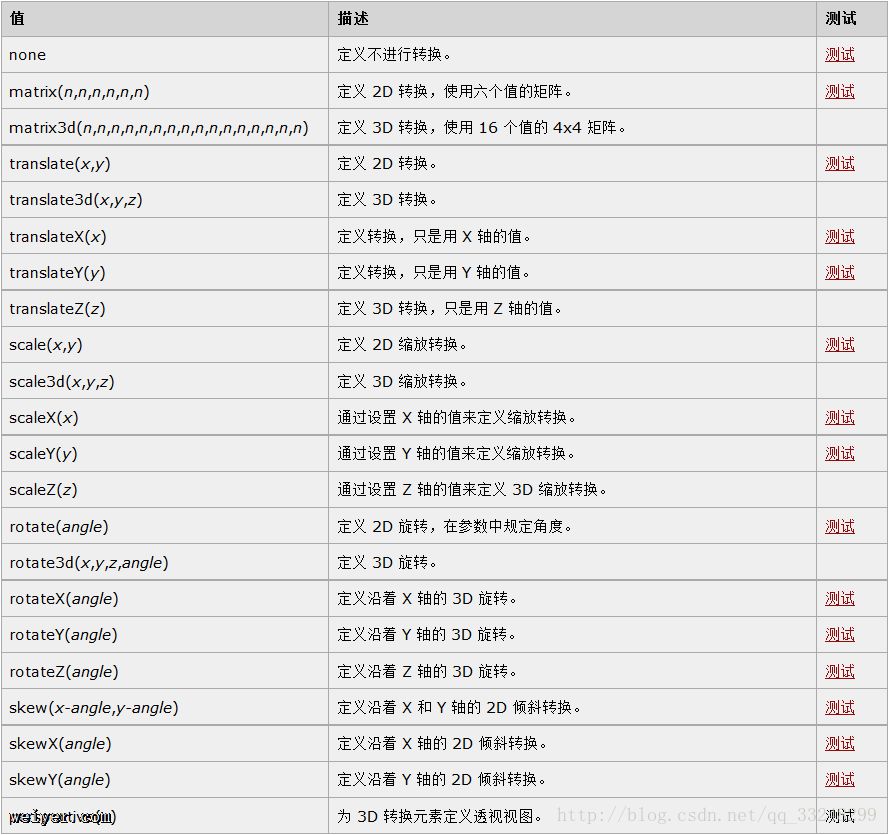
transform-origin:该属性摄者变形的中心点 该属性值应该指定为xCenter yCenter,其中xCe
nter,yCenter支持如下几种属性:
left top right bottom center 长度值 百分比:分别指定旋转中心点位于HTML组件的哪边界
其中left right只能指定给xCenter
right bottom只能指定给yCenter
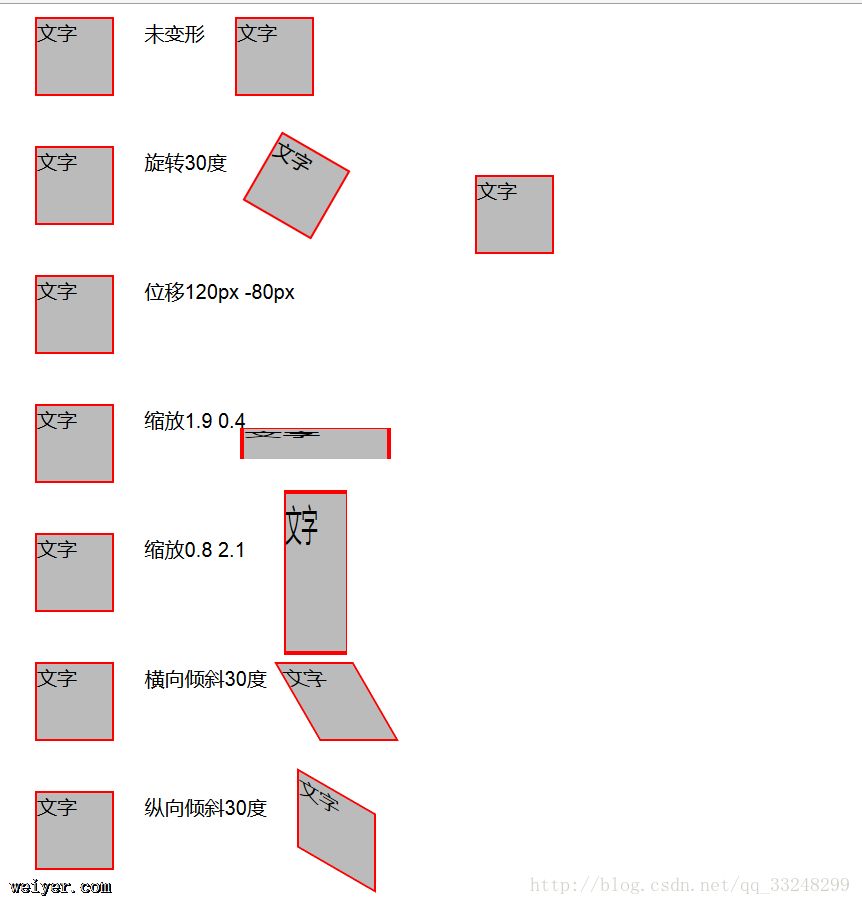
四种基本变形
<!DOCTYPE html>
<html lang="en">
<head>
    <meta charset="UTF-8">
    <title>动画</title>
    <style>
         p{
             display: inline-block;
             width: 60px;
             height: 60px;
             border: 2px solid red;
             margin: 20px;
             background-color: #bbb;
         }
    </style>
</head>
<body>
       <p>文字</p>   未变形  <p>文字</p><br/>

        <p>文字</p>  旋转30度     <p style="-moz-transform: rotate(30deg);-webkit-transform: rotate(30deg);-o-transform: rotate(30deg);">文字</p><br/>

        <p>文字</p>  位移120px -80px  <p style="-moz-transform: translate(120px,-80px);-webkit-transform: translate(120px,-80px);-o-transform:translate(120px,-80px);">文字</p><br/>

         <p>文字</p> 缩放1.9 0.4  <p style="-moz-transform: scale(1.9,0.4);-webkit-transform: scale(1.9,0.4);-o-transform:scale(1.9,0.4);">文字</p><br/>

       <p>文字</p> 缩放0.8 2.1 <p style="-moz-transform: scale(0.8,2.1);-webkit-transform: scale(0.8,2.1);-o-transform:scale(0.8,2.1);">文字</p><br/>

       <p>文字</p> 横向倾斜30度 <p style="-moz-transform:skew(30deg);-webkit-transform: skew(30deg);-o-transform:skew(30deg);">文字</p><br/>

       <p>文字</p> 纵向倾斜30度 <p style="-moz-transform:skewY(30deg);-webkit-transform: skewY(30deg);-o-transform:skewY(30deg);">文字</p><br/>
</body>
</html>
效果:
同时应用多种变形
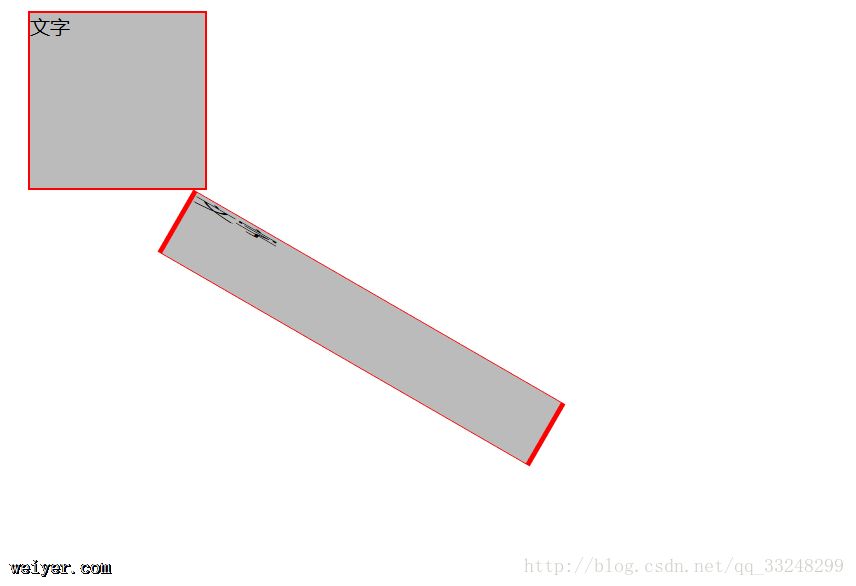
如果希望我们为HTML组件同时应用多种变形 可以为transform同时指定多个变形函数
比如看如下代码:
<!DOCTYPE html>
<html lang="en">
<head>
    <meta charset="UTF-8">
    <title>动画</title>
    <style>
         p{
            position: absolute;
             width: 140px;
             height: 140px;
             border: 2px solid red;
             margin: 20px;
             background-color: #bbb;
         }
    </style>
</head>
<body>

        <p>文字</p>   <p style="-moz-transform: rotate(30deg) translate(260px,60px) scale(2.4,0.4);-webkit-transform: rotate(30deg) translate(260px,60px) scale(2.4,0.4);-o-transform: rotate(30deg) translate(260px,60px) scale(2.4,0.4);">文字</p><br/>
</body>
</html>
效果:
<!DOCTYPE html>
<html lang="en">
<head>
    <meta charset="UTF-8">
    <title>动画</title>
    <style>
         p{
            position: absolute;
             width: 140px;
             height: 140px;
             border: 2px solid red;
             margin: 20px;
             background-color: #bbb;
         }
    </style>
</head>
<body>

        <p>文字</p>   <p style="-moz-transform: translate(260px,60px) scale(2.4,0.4) rotate(30deg) ;-webkit-transform: translate(260px,60px) scale(2.4,0.4) rotate(30deg) ;;-o-transform: translate(260px,60px) scale(2.4,0.4) rotate(30deg) ;">文字</p><br/>
</body>
</html>
仅仅把翻转放到最后 效果就不一样了
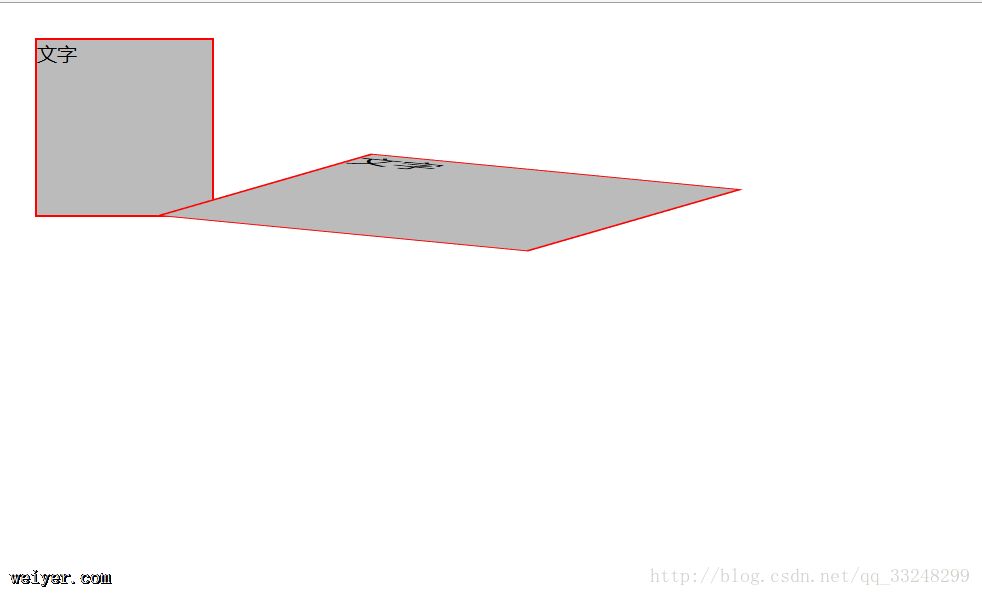
所以需要注意下 3种同样的变换 如果变换的顺序不同 那么效果也是不同的
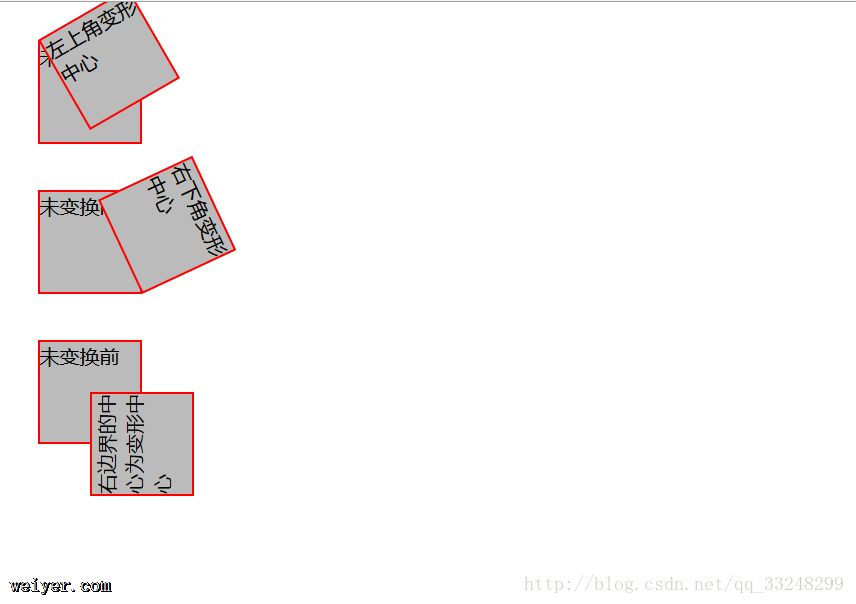
指定变形中心点
<!DOCTYPE html>
<html lang="en">
<head>
    <meta charset="UTF-8">
    <title>动画</title>
    <style>
         p{
             position: absolute;
             width: 80px;
             height: 80px;
             border: 2px solid red;
             background-color: #bbb;
         }

        p.a{
            left: 30px;
            top:30px;
        }

        p.b{
            left:30px;
            top:150px
        }

        p.c{
            left: 30px;
            top:270px;
        }
    </style>
</head>
<body>

        <p class="a">未变换前</p>
         <p class="a" style="-moz-transform-origin:left top;-moz-transform: rotate(-30deg) ;
         -webkit-transform-origin:left top;-webkit-transform: rotate(-30deg) ;
         -o-transform-origin:left top;-o-transform: rotate(-30deg) ;">左上角变形中心</p><br/>

        <p class="b">未变换前</p>
        <p class="b" style="-moz-transform-origin:right bottom;-moz-transform: rotate(65deg) ;
         -webkit-transform-origin:right bottom;-webkit-transform: rotate(65deg) ;
         -o-transform-origin:right bottom;-o-transform: rotate(65deg) ;">右下角变形中心</p><br/>

        <p class="c">未变换前</p>
        <p class="c" style="-moz-transform-origin:right center;-moz-transform: rotate(-90deg) ;
         -webkit-transform-origin:right center;-webkit-transform: rotate(-90deg) ;
         -o-transform-origin:right center;-o-transform: rotate(-90deg) ;">右边界的中心为变形中心</p><br/>
</body>
</html>
CSS3提供的Transition动画
CSS3提供了Transition动画支持 可以控制HTML组件的某个属性发生改变时会经理一段时间 以平滑渐变的方式发生改变 这就产生了动画效果
Transition属性值包括如下4个:

transition-property可以指定background-color,width,height等
transition-duration:平滑渐变的时间
transition-timing-function:渐变的速度 值可以由如下图几种

transition-delay:指定延迟时间
<!DOCTYPE html>
<html>
<head>
    <meta charset="UTF-8">
    <title>动画</title>
    <style>
        p
        {
            width:100px;
            height:100px;
            background:blue;
            transition:background-color 4s linear;
            -moz-transition:background-color 4s linear; /* Firefox 4 */
            -webkit-transition:background-color 4s linear; /* Safari and Chrome */
            -o-transition:background-color 4s linear; /* Opera */
        }

        p:hover
        {
            background-color:yellow;
        }
    </style>
</head>
<body>

<p>鼠标移上来会发生颜色渐变</p>


</body>
</html>
鼠标移上来会发生颜色渐变
效果不言而喻 鼠标移上去p区从红色渐变黄色
多个属性同时渐变
<!DOCTYPE html>
<html>
<head>
    <meta charset="UTF-8">
    <title>动画</title>
    <style>
       #target{
           position: absolute;
           transition: left 5s linear,top 5s linear;
           -moz-transition: left 5s linear,top 5s linear;
           -webkit-transition: left 5s linear,top 5s linear;
           -o-transition: left 5s linear,top 5s linear;
       }

    </style>
</head>
<body>

      <img src="1.png" alt="气球" id="target">

         <script>
                  var target=document.getElementById("target");
                 target.style.left="0px";
                 target.style.top="0px";

                     document.onmousedown=function (evt) {
                         alert(evt.pageX);
                         alert(evt.pageY);
                             target.style.left=evt.pageX+"px";
                         target.style.top=evt.pageY+"px";
                     }
         </script>


</body>
</html>
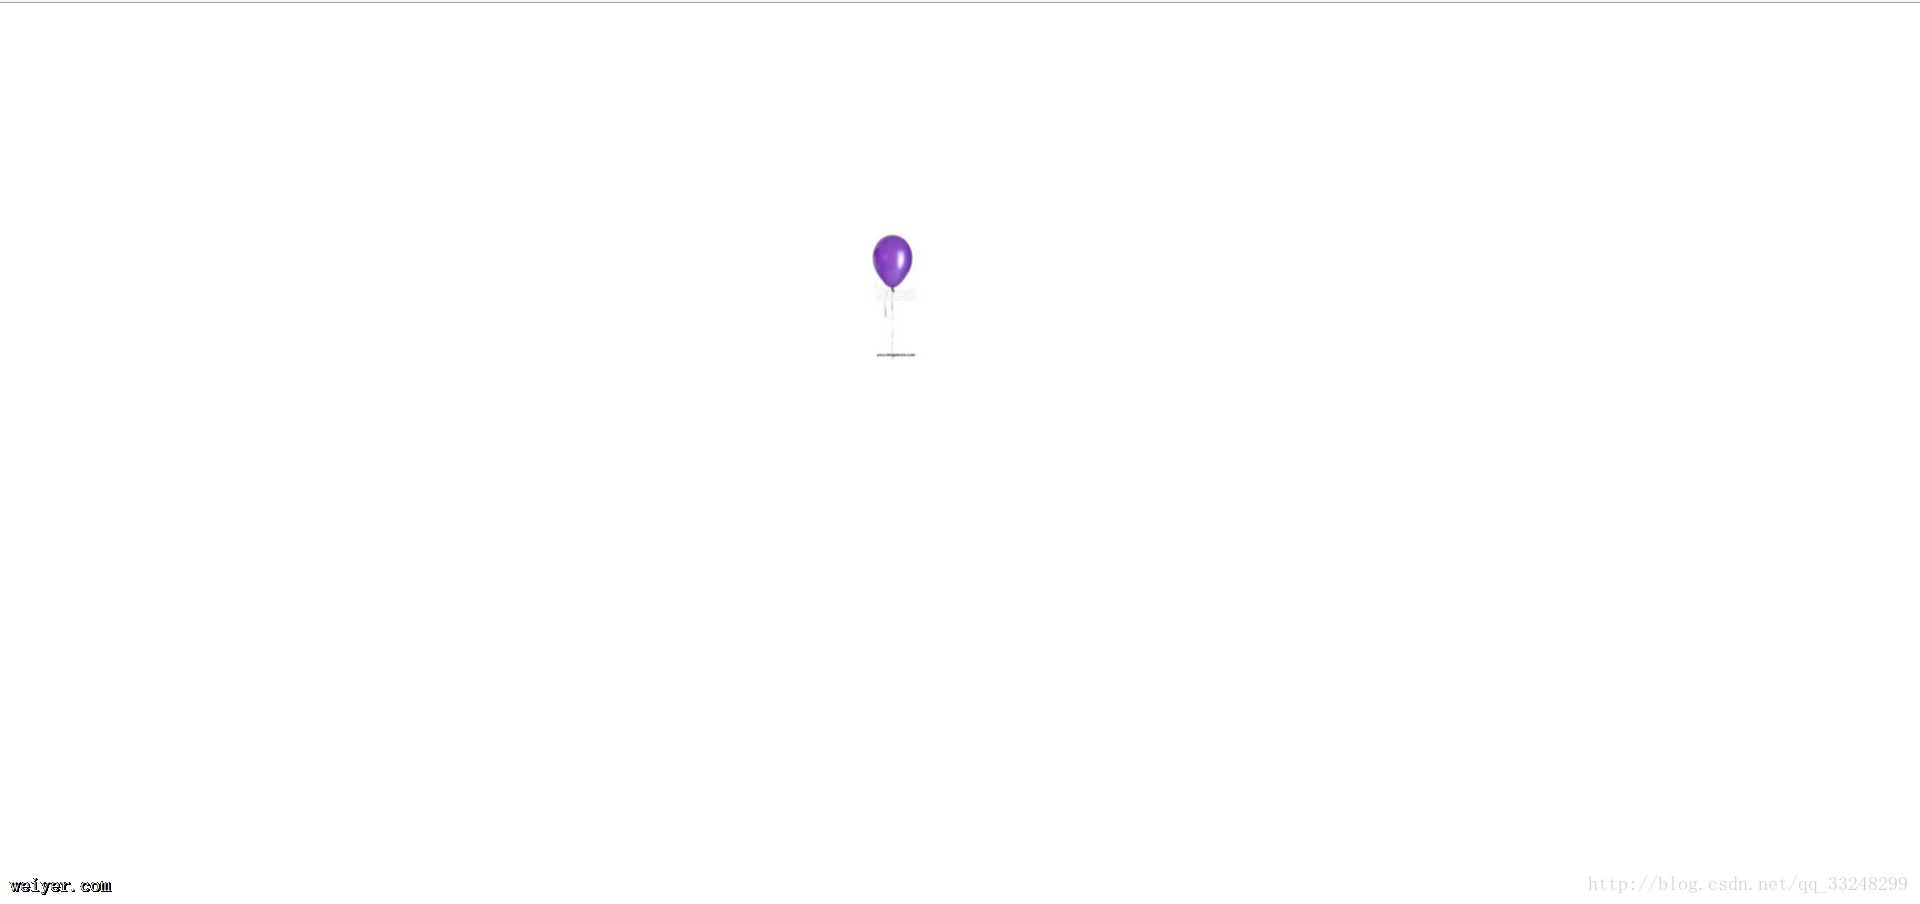
鼠标点击网页上哪里 这个图片就会移向哪里
<!DOCTYPE html>
<html>
<head>
    <meta charset="UTF-8">
    <title>动画</title>
    <style>
        p{
            width: 200px;
            height: 180px;
            background-color: red;

            transition: background-color 2s linear 2s,width 2s linear 2s,height 2s linear 2s;/*延迟了两秒*/
            -moz-transition:background-color 2s linear 2s,width 2s linear 2s,height 2s linear 2s;
            -webkit-transition: background-color 2s linear 2s,width 2s linear 2s,height 2s linear 2s;
            -o-transition: background-color 2s linear 2s,width 2s linear 2s,height 2s linear 2s;
        }

    </style>
</head>
<body>

        <p id="target"></p>

        <button onclick="zoom(2.0,'blue')">放大</button>
        <button onclick="zoom(0.5,'yellow')">缩小</button>
        <button onclick="zoom(1,'red')">恢复</button>
         <script>
                   var target=document.getElementById("target");
                   var Width=200;
                   var Height=180;
                    function zoom(scale,bgColor) {
                        target.style.width=Width*scale+"px";
                        target.style.height=Height*scale+"px";

                        target.style.backgroundColor=bgColor;
                    }
         </script>


</body>
</html>
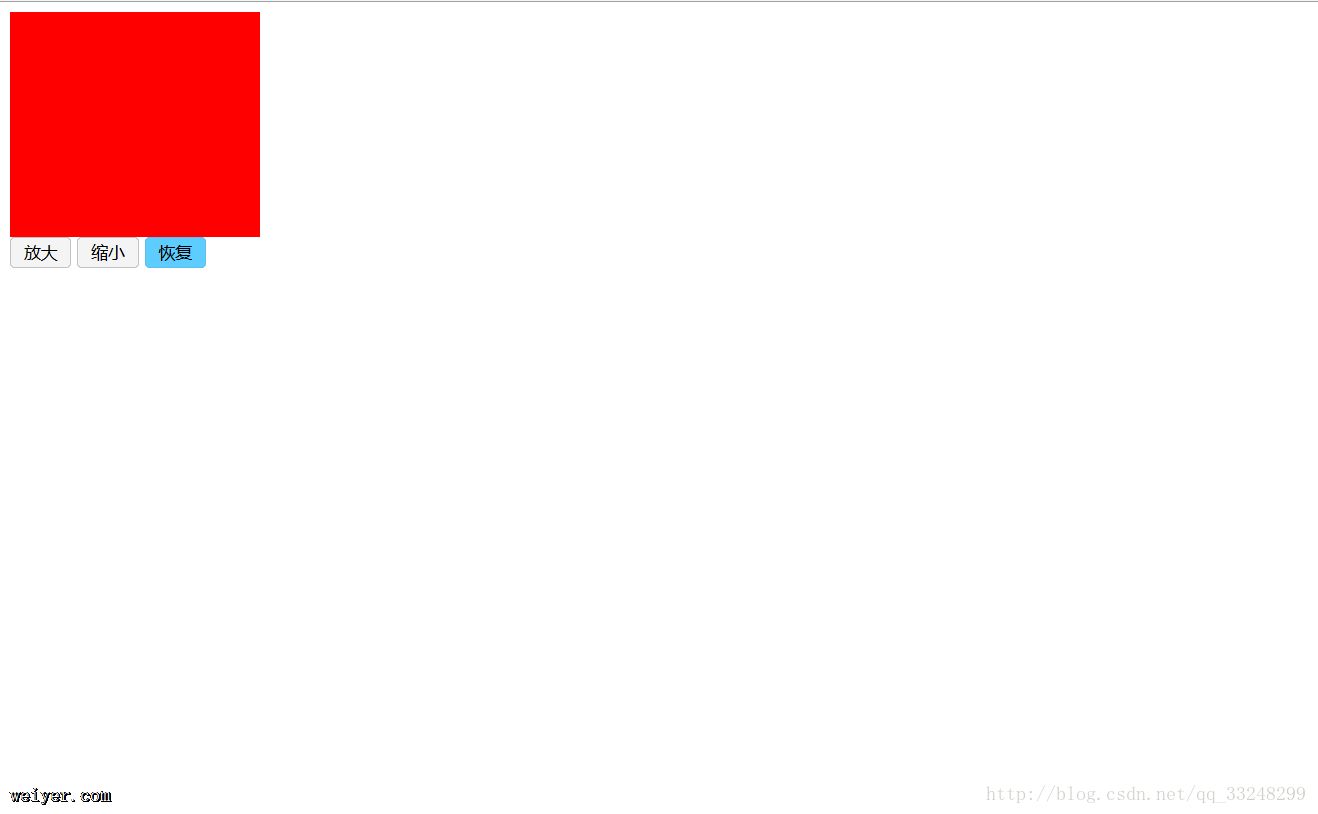
效果:
CSS3中提供的Animation动画
animation 属性是一个简写属性,用于设置六个动画属性:

形式:
  @keyframes 动画名 {
   百分比{...}
    ...
  }
   ...:hover{
                animation-name:调用动画名;
        }
看下面的例子:
<!DOCTYPE html>
<html lang="en">
<head>
    <meta charset="UTF-8">
    <title>animation动画</title>
    <style>
         @-webkit-keyframes donghua {
             0% {
                 left: 100px;
             }
             40% {
                 left: 150px;
             }
             60% {
                 left: 75px;
             }
             100% {
                 left: 100px;
             }
         }
         @-o-keyframes donghua {
             0% {
                 left: 100px;
             }
             40% {
                 left: 150px;
             }
             60% {
                 left: 75px;
             }
             100% {
                 left: 100px;
             }
         }
         @-moz-keyframes donghua {
             0% {
                 left: 100px;
             }
             40% {
                 left: 150px;
             }
             60% {
                 left: 75px;
             }
             100% {
                 left: 100px;
             }
         }
         p{
             position: absolute;
             border: 1px solid red;
             width: 90px;
             height: 90px;
             background-color: #FF9A66;
         }
        p:hover{
                animation-name: donghua;
            animation-duration: 5s;
            animation-iteration-count:3;
        }
    </style>
</head>
<body>
       <p>移动到p出现动画效果</p>
</body>
</html>
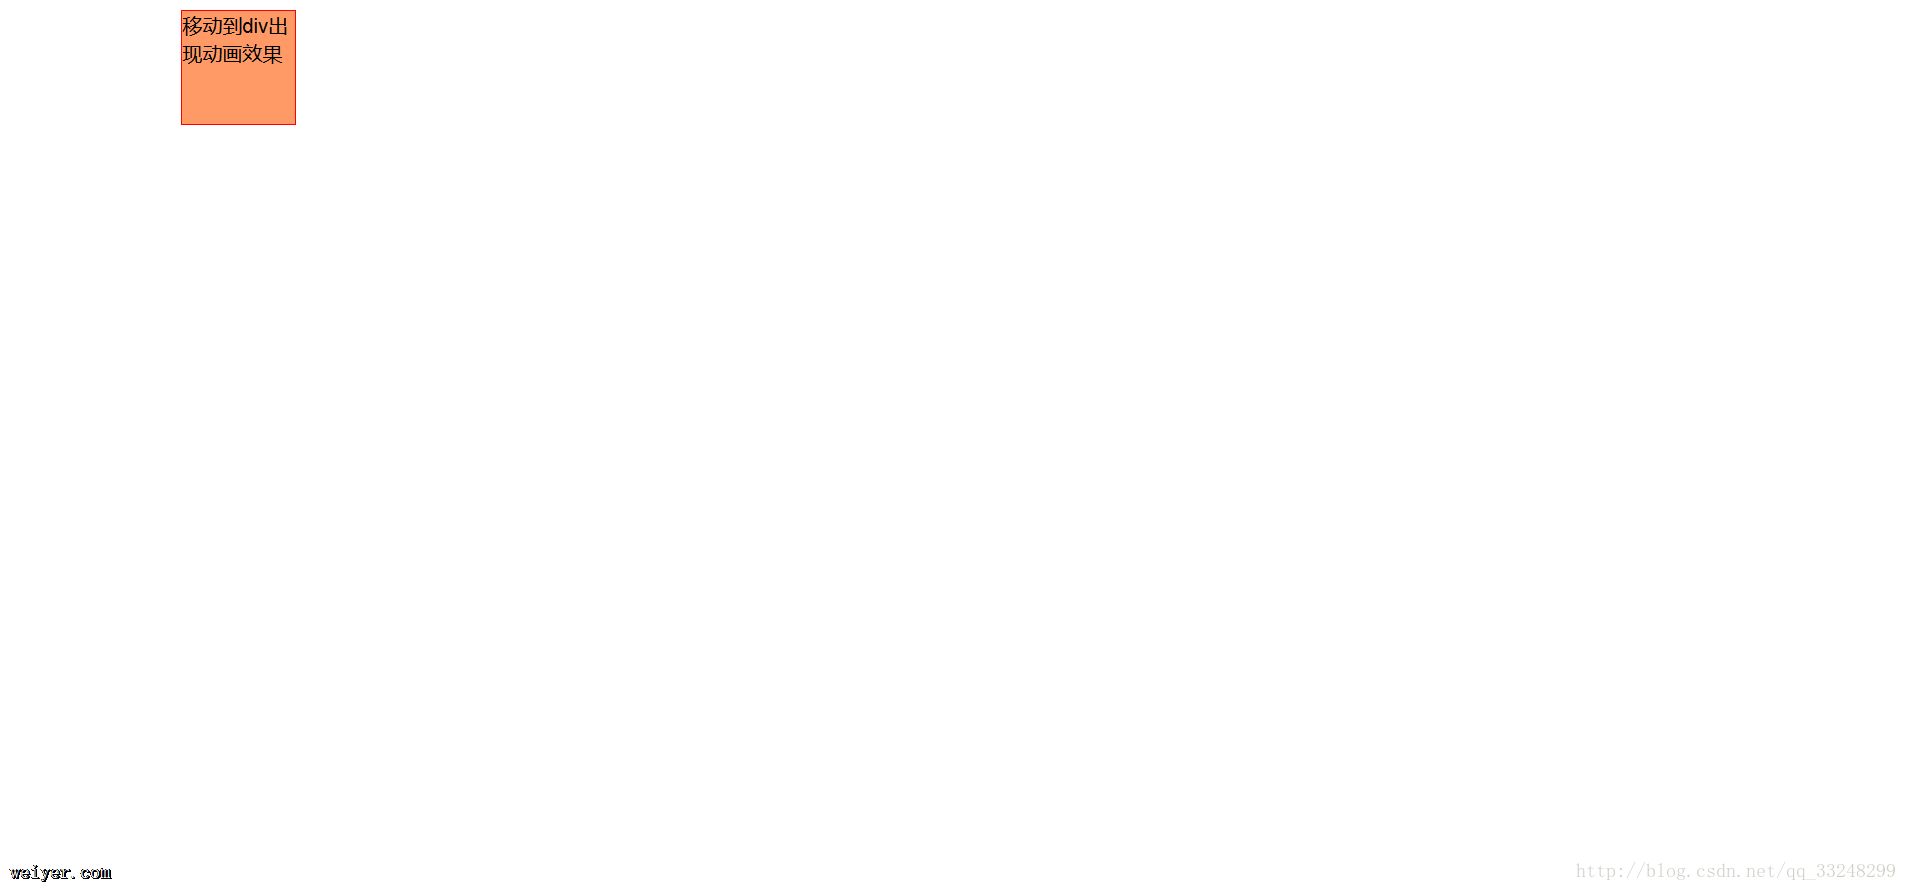
效果:
以下附一个鱼眼效果的代码:
<!DOCTYPE html>
<html lang="en">
<head>
    <meta charset="UTF-8">
    <title>鱼眼效果</title>
         <style>
                p>a{
                    margin-left: 30px;
                    display: inline-block;
                    text-align: center;
                    border: 1px solid red;
                    border-radius: 20px;
                    padding: 5px;
                    background-color: #eee;
                }
             a:link{
                 text-decoration:none;
             }
             @-webkit-keyframes change{
                   0%{
                       -webkit-transform: scale(1);
                       background-color: #eee;
                       border-radius: 10px;
                   }
                  40%{
                      -webkit-transform: scale(1.5);
                      background-color: #bbb;
                      border-radius: 10px;
                  }
                 100%{
                     -webkit-transform: scale(1);
                     background-color: #eee;
                     border-radius: 10px;
                 }
             }
             @-moz-keyframes change {
                  0%{
                      -moz-transform: scale(1);
                       background-color: #eee;
                      border-radius: 10px;
                  }
                  40%{
                      -moz-transform: scale(1.5);
                      background-color: #bbb;
                     border-radius: 10px;
                  }
                  100%{
                       -moz-transform: scale(1);
                      background-color: #eee;
                      border-radius: 10px;
                  }
             }
             @-o-keyframes change {
                 0%{
                     -o-transform: scale(1);
                     background-color: #eee;
                     border-radius: 10px;
                 }
                 40%{
                     -o-transform: scale(1.5);
                     background-color: #bbb;
                     border-radius: 10px;
                 }
                 100%{
                     -o-transform: scale(1);
                     background-color: #eee;
                     border-radius: 10px;
                 }
             }
             a:hover{
                 animation-name:  change;
                 animation-duration: 3s;
                 animation-iteration-count: infinite;
             }
         </style>
</head>
<body>
          <p>
               <a>JAVASE从入门到放弃</a>
              <a>JAVAEE从入门到放弃</a>
              <a>javasrcipt从入门到放弃</a>
              <a>css从入门到放弃</a>
          </p>
</body>
</html>
效果:

